Centroid CNC control sales, service, training and support
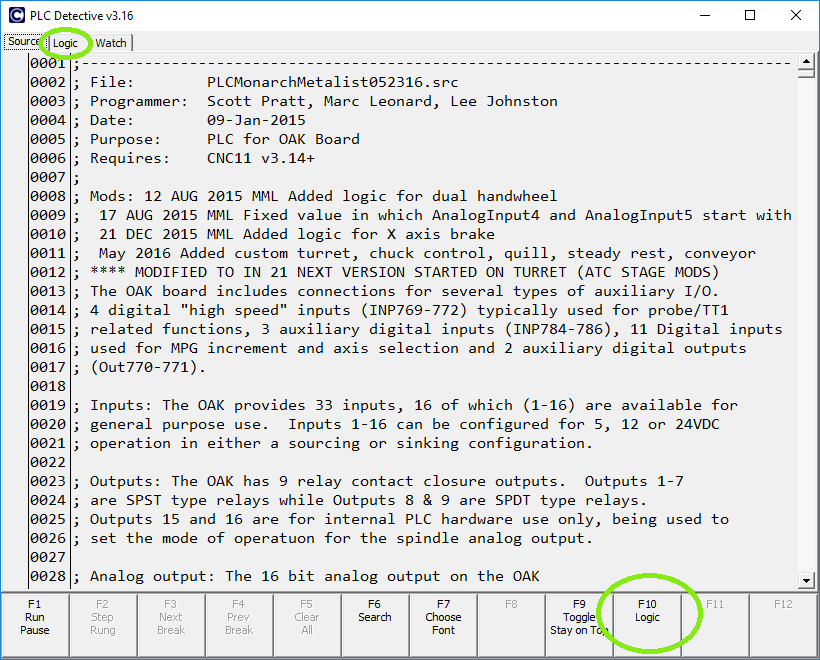
From the CNC11 main screen, press Ctrl-E to launch PLC Detective. You will initially see the "Source" page, with your current PLC program.

Either press F10 or click on the "Logic" tab to switch to the Logic Analyzer page.
The Logic Analyzer page has a list of up to 32 bits (I/O locations, memory bits, or system flags) which you can monitor, displayed down the left side of the screen. You will select the items to monitor by clicking in these boxes.
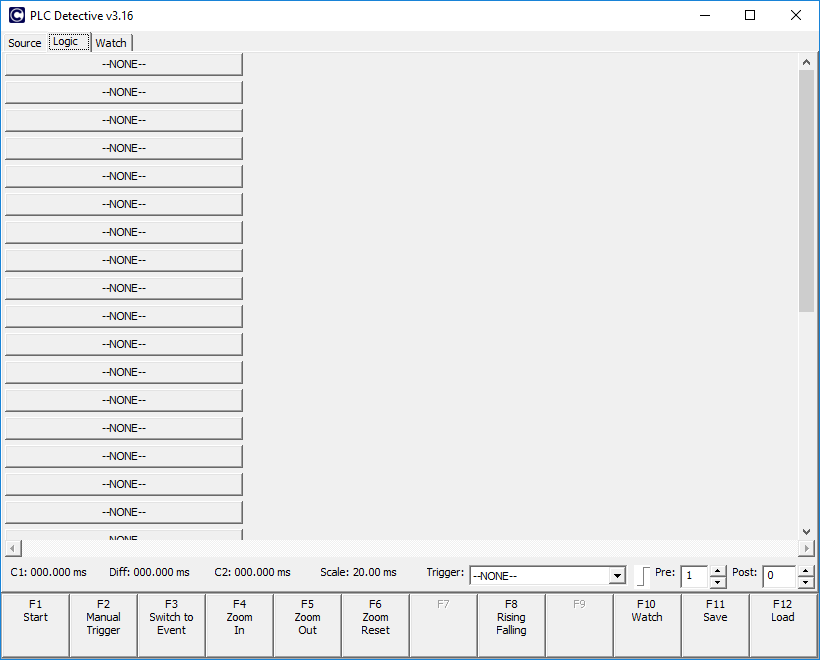
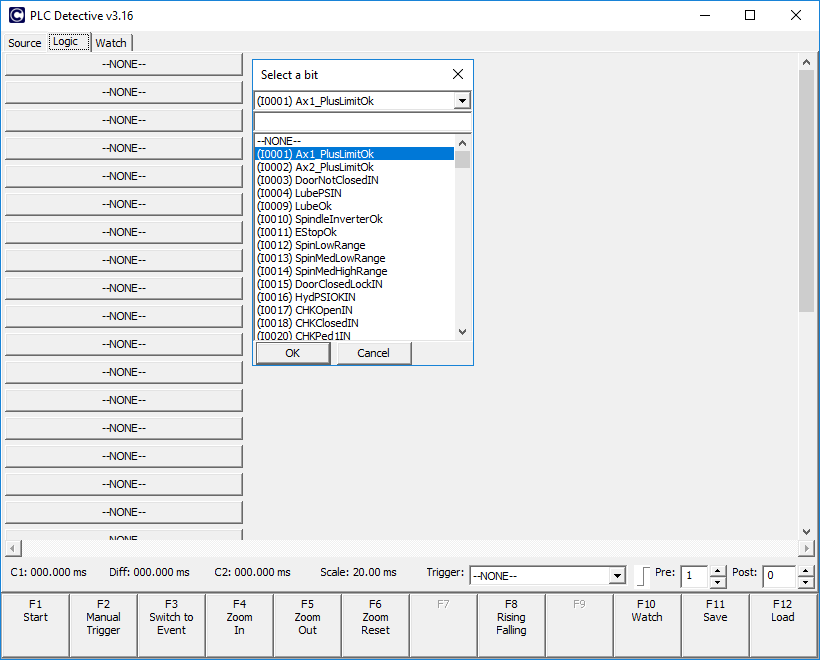
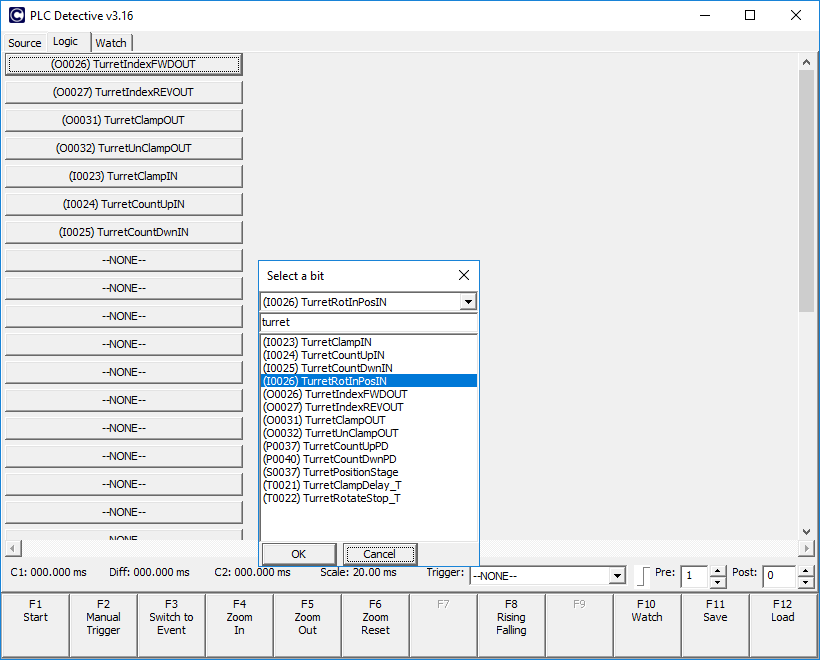
Click on the top-most box. The "Select a bit" window appears, with a list of all of the named one-bit locations in the PLC program.
Note that the logic analyzer cannot display Word (integer or floating point) variable values. It can only display one-bit locations such as inputs, outputs, memory bits, M function requests, and other one-bit system variables.
Note also that it can only display items that have been given a name in the PLC program source. Thus something like "M3", which is a name given to SV_M94_M95_1, can be selected; but something like SV_PROGRAM_RUNNING cannot be selected unless you give it an alternate name in your PLC source.
You can scroll through all the bits in the list to find the ones you want. They are sorted by type ('I' for inputs, 'IJ' for jog panel inputs, 'M' for memory bits, 'O' for outputs, etc.) and by number.
However, you can simplify the search by typing all or part of a name on the second line of the "Select a bit" dialog. For example, if we type "turret" there, then the list will be limited to all items which contain the word "turret" somewhere in their names.
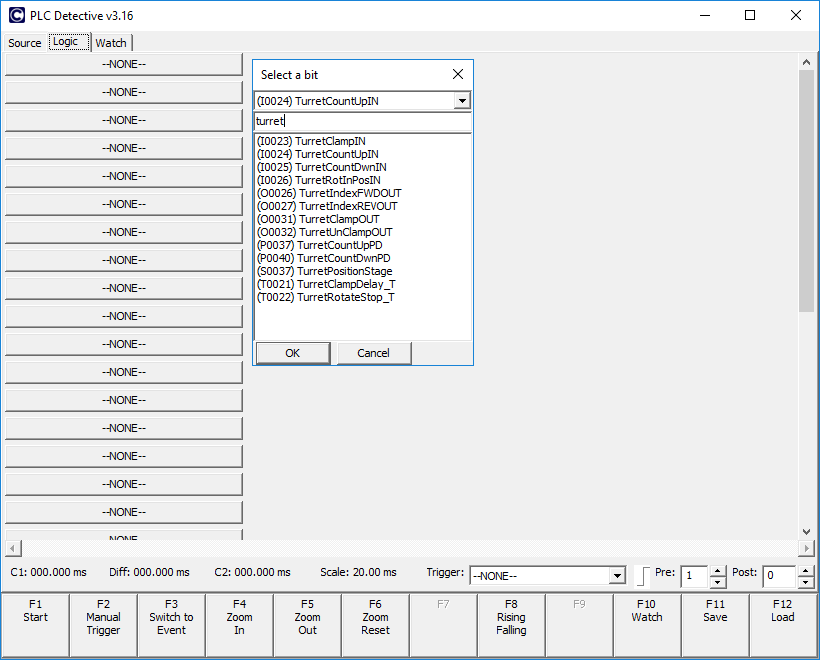
To select an item to monitor, click on its name in the list, then press Enter. The name of that item will be displayed in the box/button along the left side of the screen.
You can then click on the next box/button down, and select another item to display there. The search filter (e.g. "turret") remains in effect until you change or delete it.
Select all the items you want to monitor, in whatever order seems intuitive to you.
Finally, also select the "IJ" input for some jog panel key that has little or no effect on the operation you will be testing. In this example, I have selected "IJ027", the "x1" jog increment key. I will explain the reason for this later, when we are ready to begin the data collection.
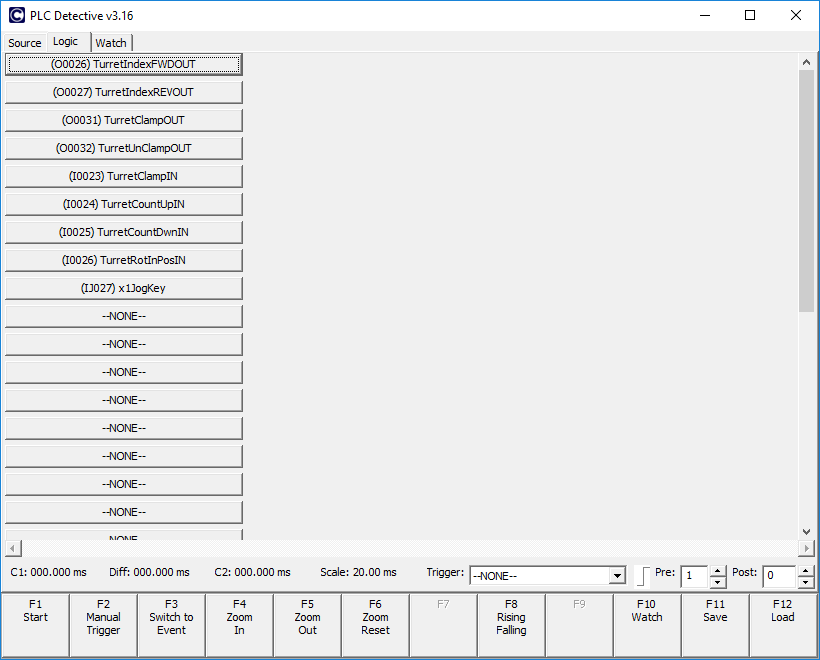
Next, click in the "Trigger" box at the bottom of the screen. You will see a drop-down list of all the items that you have selected to monitor. Choose the one that you want to trigger a data capture.
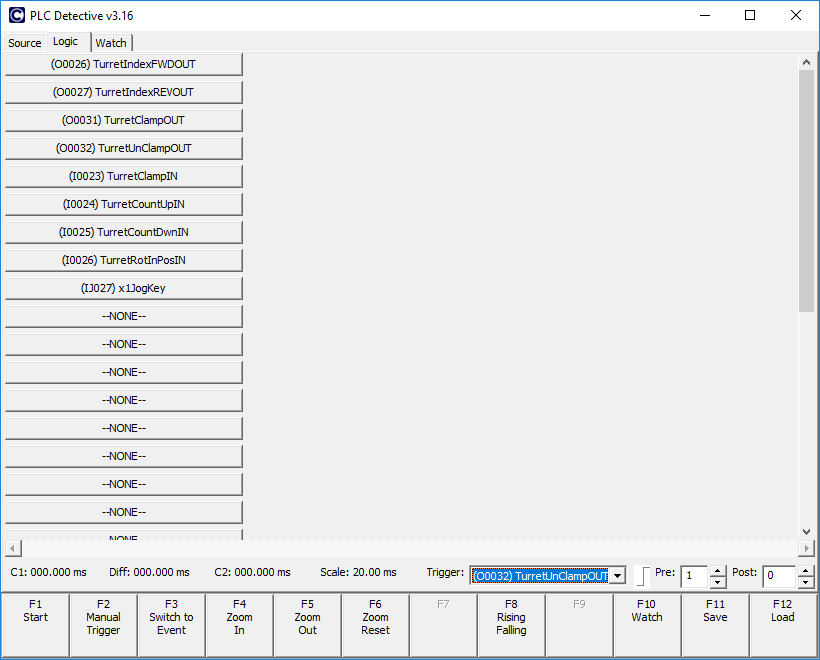
In this case I have chosen the output which unlocks the turret, as that is a good starting point for watching turret rotation.
Optionally, you can press the F8 key to toggle the trigger action between rising-edge (the default) and falling-edge.
Next, click in the "Pre" and "Post" boxes, and enter the number of events (changes in the state of monitored bits) which you want to save before the trigger event, and after the trigger event.
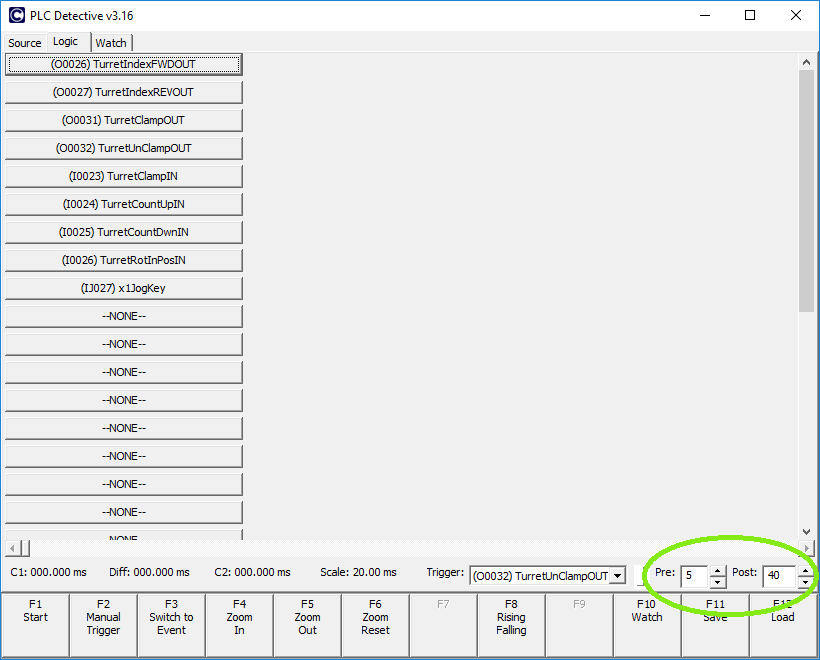
In this example I have requested that PLC Detective save five events from before the trigger (rising edge of OUT32), and 40 events from after the trigger.
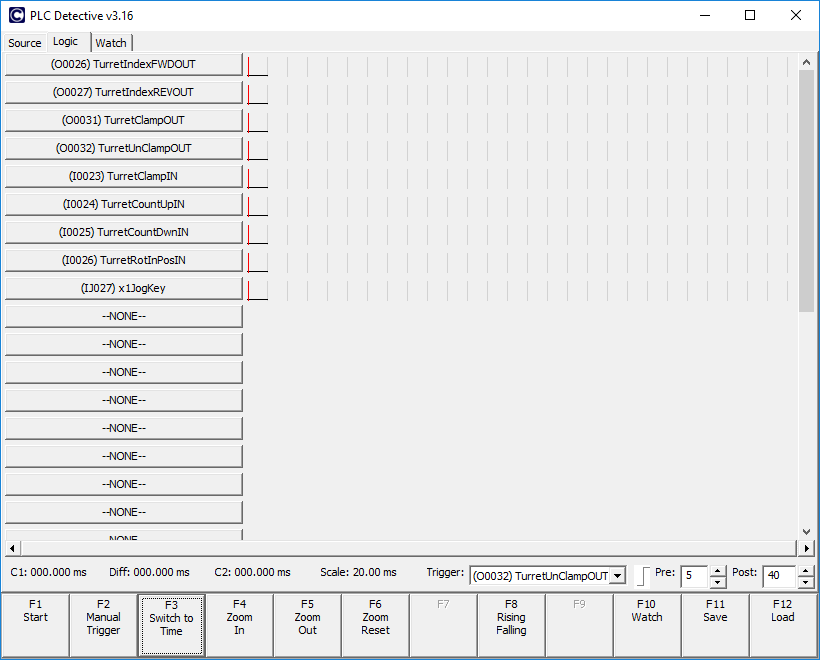
Finally, press F3 or click the "Switch to Event" button, to switch the horizontal display mode from time-based to event-based.
If the F3 button box says "Switch to Time", then the display is already in the event-based mode.
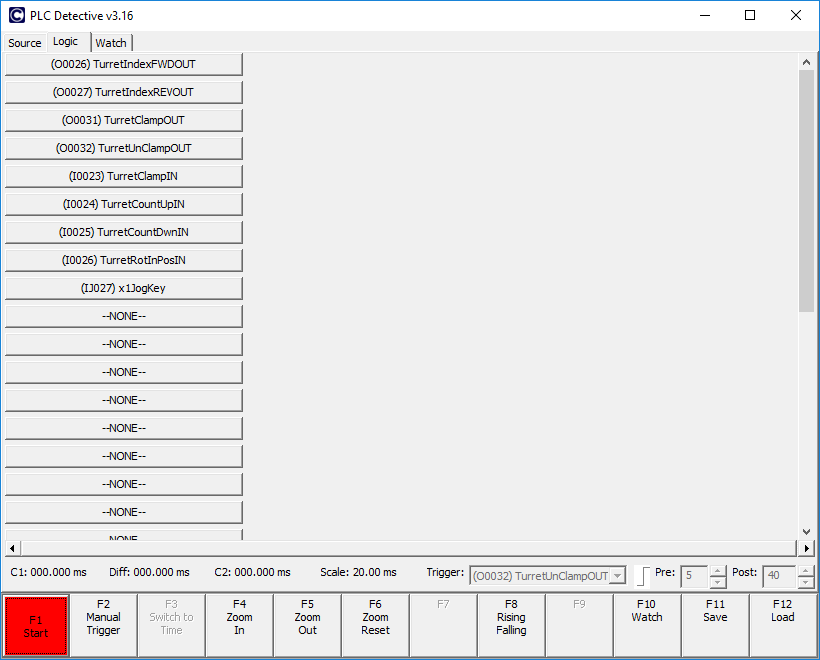
The PLC Detective Logic Analyzer is now set up and ready to capture data. Press F1 or click the "Start" button to "Arm" the logic analyzer
Once "Start" is armed, it will begin recording and displaying data, and at the same time it will watch for the triggering event.
If Start is armed, but the triggering event has not yet happened, then the F1/Start button will display in Red.
Once the triggering event happens, and the logic analyzer is collecting the requested number of "Post" events, the F1/Start button will display in Yellow.
Once the requested events have all been recorded, then the F1/Start button will revert to its usual Gray.
You can terminate a collection early by pressing the F1/Start button again.
But there is a problem.... Remember that extra jog panel key we added to the list of items to monitor? That is to work around a bug in the logic analyzer. It turns out that, after you press F3 to switch to event-based display, then press F1 to start a collection, the logic analyzer will lose (ignore) the first event that happens. If that event is the intended triggering event, then it will fail to trigger.
To work around this, after you have pressed F1/Start to arm the trigger, then press the token jog panel key (in this case, the "x1" jog increment key). That will cause two events: a rising edge when you press the key down, and a falling edge when you release the key. You will probably see that the rising edge does not appear on the screen, but the falling edge does. You have now fed the logic analyzer its sacrificial event. All subsequent events, including the intended trigger, will register properly.
Now you can run the machine, however you need to, until the triggering event has happened and the desired data has been collected. It does not matter whether PLC Detective remains in the foreground, or you bring CNC11 back to the foreground (e.g. with Alt-Tab). CNC11 will run and PLC Detective will collect data, foreground or background.
With a completed data collection on the screen, you can use the left and right mouse buttons to position the red cursor bars on the plot. These bars are used to measure time intervals. See the "C1", "C2" and "Diff" values displayed at the bottom of the screen.
Once you have completed all the setups, and again once you have done a data collection, you will want to save both things in a text file for later use and analysis. PLC Detective saves logic analyzer setups and data together in the same file. Simply press F11/Save; verify that you are saving into the "c:\cncm" (for mills) or "c:\cnct" (for lathes) directory, and enter the desired filename.
I like to preface the names with "pd", and include the word "logic". I also like to use the extension ".txt", as this ensures that the files will automatically be swept up in any subsequent reports.
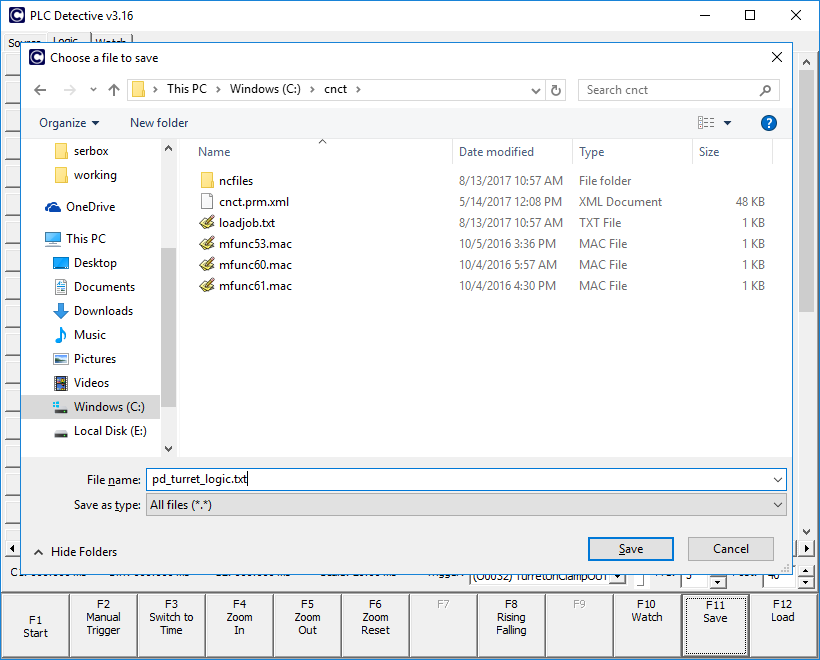
Once setups (and data) have been saved, you can recall them in a future PLC Detective session using the F12/Load key. This way you do not have to go through the process of selecting all the items again.
Copyright © 2017 Marc Leonard
Last updated 14-Aug-2017 MBL